Friday, December 23, 2011

Happy Holidays!!!

I want to take a moment to wish you all a very Happy Holiday!Whatever you are celebrating and whomever you are celebrating with,enjoy this time of year to the fullest!Before you know it,we'll be talking about Valentine's Day ideas!!!I'm off to my boys' classrooms bearing trays of goodies!I'll be back after Christmas!I wish you all a very "sweet" holiday!
  Enjoy!!!

Monday, December 19, 2011

Red Velvet Cookies

Here is a great recipe from Southern Living....not only do they look great,they taste great!Your guests will rave about them!The icing is one to remember. These cookies are a bit large,so feel free to make them smaller if desired.

Ingredients:
2-3/4 c. flour
1/3 c. unsweetened cocoa
1-1/2 tsp. baking powder
1/2 tsp. baking soda
1/4 tsp. salt
1 c. butter,softened
1-1/4 c. sugar
2 eggs
2 Tbsp. red food coloring
1 tbsp. vanilla
3/4 c. buttermilk
   In the bowl of your mixer,blend together the butter & sugar.Add the eggs,beating well,followed by the food coloring & vanilla.
   Add the flour mixture and the buttermilk,alternating between the two,beginning & ending with the flour.Drop by 1/4 cupfuls about 3 inches apart on a parchment lined baking sheet.Spread dough to make 3" rounds.Bake at 350 degrees until tops are set,about 15 minutes.Cool completely.Frost with cream cheese frosting,and crumble one cookie to sprinkle on the tops.These can be stored in the refrigerator up to 5 days.

Cream Cheese Frosting:
1 8oz. package of cream cheese,softened
1/2 c. butter,softened
1/2 tsp. vanilla
dash of salt
1-1lb. box of powdered sugar
   Mix all ingredients together in the bowl of your mixer until creamy.Spread on tops of Red Velvet Cookies.

Sunday, December 18, 2011

An Edible Christmas Village

THIS IS NOT MY CREATION, but I wish it were!!!This beautiful array of hand decorated cookies was created by Anne from Flourbox Bakery,and I love it!How can you not possibly be inspired by this?It put a smile on my face immediately,and I just had to share.Imagine creating something like this,and having just had a baby?Anne...you amaze me!Take a look at this village and so much more when you visit her site.You will be so glad you did!  http://www.flourboxbakery.com/

Friday, December 16, 2011

Martha/Eataly/Mario

Yesterday ,I had the perfect day.My dearest friend & I ventured into NYC to see the Martha Stewart Show.It must have been our lucky day...we received many generous giveaways,a Honey Baked Ham,Martha Stewart cleaning products,her new parchment- lined foil,and a gift certificate to the Sundance Catalog!Even the FDNY stopped in to give out their latest calendar.It was a great show,and I cannot wait to go back again!
   After Martha,we decided to head over to Eataly.For those of you who are not familiar with this,it is the shopping/restaurant brainchild of Mario Batali,Joe & Lidia Bastianich.It is truly an amazing place.Plenty of restaurants to dine in,and more food items available than one can imagine.I was truly in my element.Let's just say this,I liked this place so much,that if given the opportunity,I would move in!!
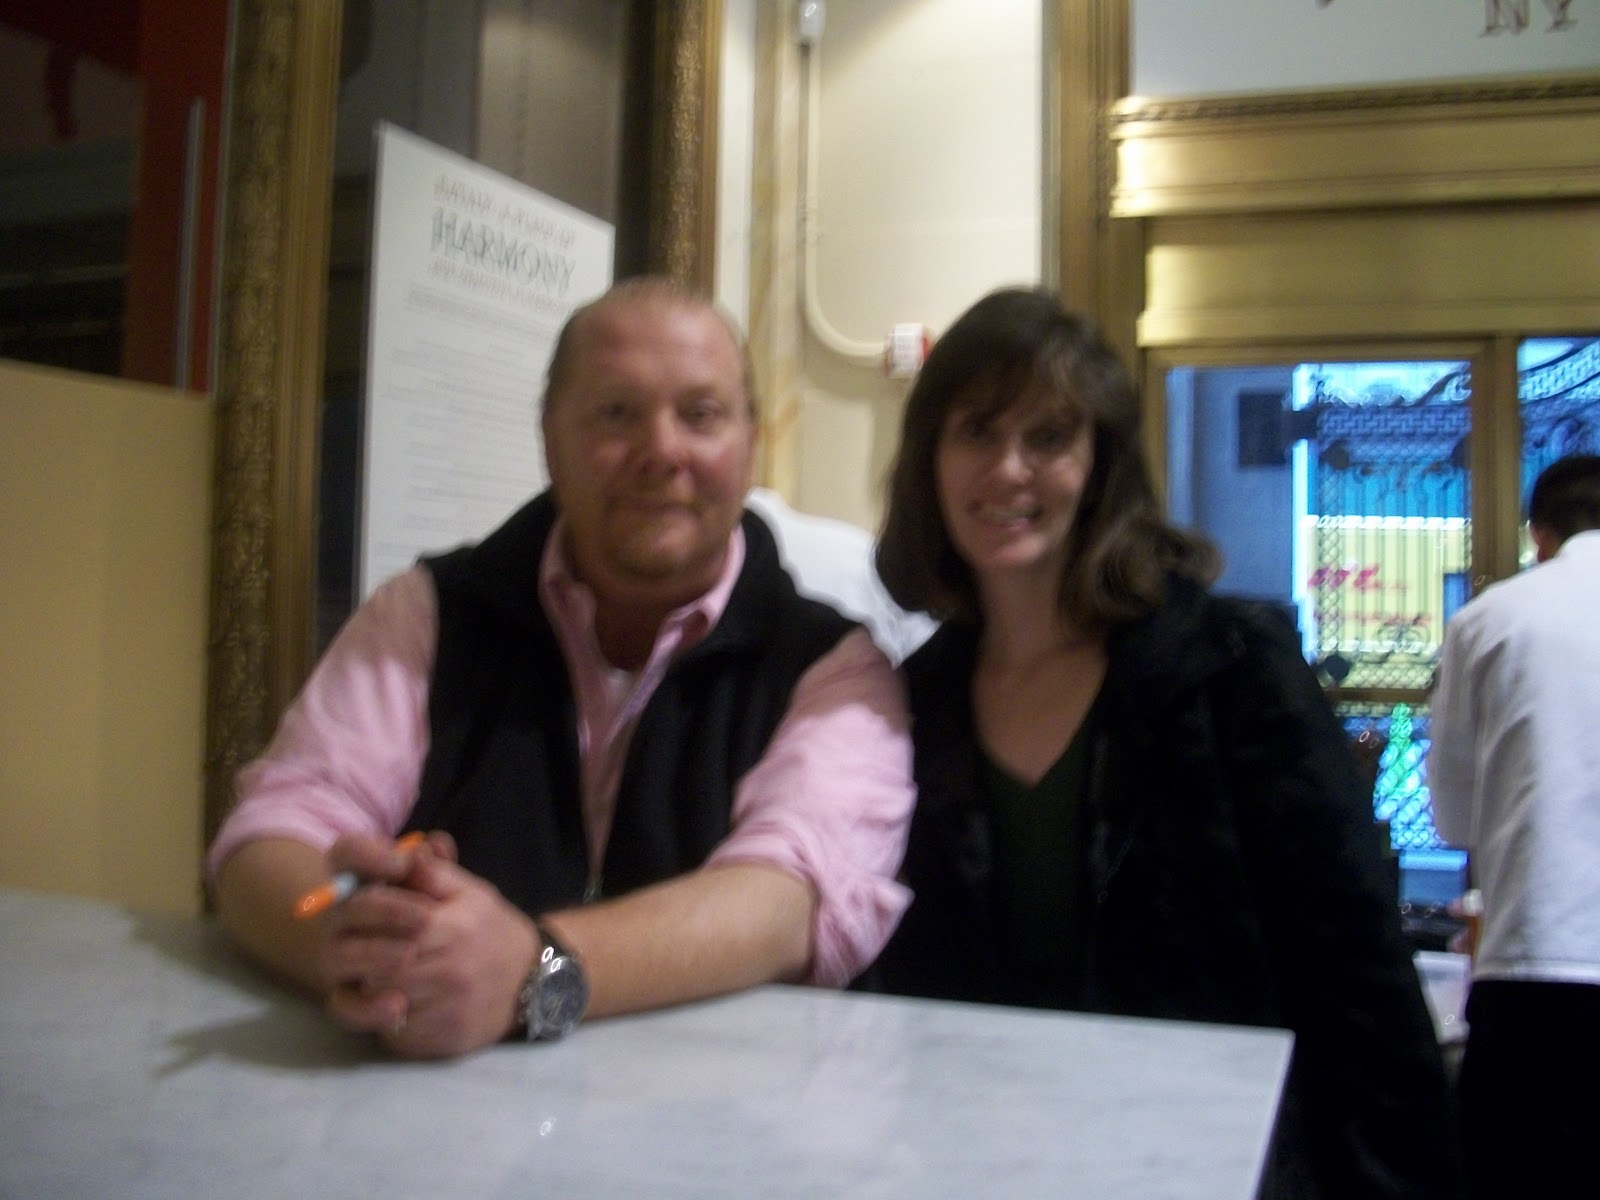
   As luck would have it,Mario was there for a book signing.Not only did we have a chance to meet him(he's very nice,by the way), I also won a 6 qt. Mario Batali dutch oven!Some people might not think much of that ,but for foodies,it is pure excitement!We had a delicious lunch there,and enjoyed browsing the endless aisles of bread,meats,pastas,oils,vegetables,etc. If you ever visit NYC,take some time to stop in  this place.You will be amazed at all it has to offer!(excuse my hairdo..the whipping city wind is no friend to this girl who is in need of a haircut)!


  So ,basically,yesterday was an "early" Christmas for me!Lots of fun,but now time to settle back down and get back to baking!As I write this,I am also baking tons of cookies for a fundraiser at my son's wrestling tournament tomorrow!Stay tuned,I'll have more cute,delicious ideas for you this week!I hope your holiday plans are going well!I've added some pictures from my adventures yesterday,I hope you enjoy them!

Tuesday, December 13, 2011

Gingerbread Tic-Tac-Toe


Here is a fun idea for your children(and you too)!Make an edible tic-tac-toe board!I wish I could take credit for the actual idea,but I spotted this one in a Paula Deen magazine a few years back,and we had a lot of fun making it. You can use gingerbread dough or sugar cookie dough.I made all of my dough,but you can use store-bought in a pinch....this is not so much about the baking as it is spending quality time with the little ones.Simply roll out the dough,cut out a nice size square(I did not measure,and mine is far from straight,that's okay). I used a little icing to adhere the m&m's to the board.I used mini cookie cutters to cut out the pieces and decorated them all.The kids will love making,playing with and eating this fun holiday project!Enjoy!!!

*** If your childen want to give this to a friend as a gift.just place the pieces in a small plastic bag and tie with ribbon.Present the board and pieces in a festive box or basket.The recipient will love it!

Gingerbread Cookies

Since I am going to see the Martha Stewart show on Thursday,and it is cookie week,why not make some of Martha's gingerbread cookies?For an easy ornament idea,just poke a straw through each cookie near the top,and bake as directed.After you have decorated them,slip some festive ribbon through the hole and hang the cookies on your tree!Notice in the picture above,the reindeer is made from an upside down gingerbread cookie cutter!

Ingredients:
3-1/2 c. flour
1 tsp. baking soda
1 tbsp. ginger
2 tsp. cinnamon
1/2 tsp. ground cloves
1/2 tsp. salt
3/4 c. brown sugar
1 stick of butter,softened
1 egg
2/3 c. unsulfured molasses

  In the bowl of your mixer,cream together the butter and brown sugar.Add the egg and molasses.Add the baking soda,cinnamon,ginger,cloves and salt.Add the flour and blend until combined.Divide the dough in half,and form two disks.Refrigerate at least one hour.
   Roll the dough out on a lightly floured surface(flour your rolling pin as well),about 1/8 inch thick.Use cookie cutters to cut out your favorite shapes.Place on a parchment lined baking sheet,and bake at 350 degrees for approximately 10-12 minutes.Remove from the oven and let cool on cooling racks.Decorate as desired!

****For my frosting,I use confectioners' sugar ,water and food coloring.I truly do not measure.I place approximately one box of the sugar(1lb.) into a bowl,and add very small amounts of water until it reaches a spreading consistency.It should not be too thick.If it seems too runny,just add more sugar.I then add a few drops of the desired color.I find that if I make a big batch of the white,I can divide it into smaller bowls and add different colorings to it.Have fun!

Sunday, December 11, 2011

Cookie Swap!

How cute are all of these printables from Amy Miller Designs?I love it!If you are thinking of having a cookie swap,or a cookie decorating party for your kids or yourself,this festive kit would add all of the special details to make your party unforgettable!Visit Amy Miller Designs on facebook ,or at http://www.amymillerdesigns.etsy.com/

Eggnog Kringla

Here is a delicious cake-like cookie with Scandanavian roots.It is perfect for the holiday season,and goes beautifully with a cup of tea.This is one of my favorites!These freeze well,just make sure not to dust them with powdered sugar & nutmeg until you remove them from the freezer and let them thaw!

4c. flour
1 tsp.baking powder
1/2 tsp. baking soda
1/2 tsp. nutmeg(I use the real thing )
3/4 c. butter,softened
1-1/2 c. sugar
1 egg
1 c. eggnog
confectioners' sugar
extra nutmeg for dusting
    In the bowl of your mixer,cream together the butter and the sugar.Add the egg,baking powder,baking soda,and nutmeg.Add the flour & eggnog,alternating between the two,starting & ending with the flour.
Chill the dough for at least one hour.


   Remove dough from the refrigerator.Roll about 1 tablespoon(or a little more) into balls.Form each ball into a long rope by rolling along the surface with your hand,using flour on your hands and the surface to prevent sticking..Form each rope into a knot as shown.Place on a cookie sheet and bake at 350 degrees for about 6-8 minutes,or until firm.Dust with powdered sugar and nutmeg.

Saturday, December 10, 2011

Candy Cane/Wreath Cookies


Looking for a fun activity to do with the kids?Here it is.My son Sean made his own today,and added bows to his wreaths..why didn't I think of that?This recipe comes from a Food Network show I watched a few years back.It has fast become a favorite in our house.The original recipe was for candy cane cookies,but I thought,why not wreaths too?If you have trouble shaping the candy canes,just make sticks instead.They taste great and make a beautiful addition to your holiday cookie plate.These freeze beautifully,but if you freeze them,drizzle the chocolate on after they have thawed.Be careful when storing,as they are fragile!Also,one note of caution,be careful when measuring your almond extract..too much can ruin the recipe.It is very strong,so only use what is required in the recipe.

Ingredients:
1 c. softened butter
1 c. confectioners' sugar
1 egg
2 tsp. almond extract
1 tsp. vanilla
1/2 tsp. salt
2-1/2 c. flour
red food coloring
24 peppermint candies(I use 12 candy canes)
1/4. c. sugar
melted chocolate(I use either candy melts or chocolate chips)
   In the bowl of your blender,mix together the butter and sugar(2-3 minutes).Add the egg,almond extract,salt,and vanilla.Add the flour.Remove half of the dough and add the food coloring to it.Using one tsp. of each color(red & white) roll dough into 4 inch ropes as shown.Twist together and form into the shape of a candy cane. Bake at 350 degrees for about 9 minutes.Take care not to burn.Remove from the oven and sprinkle with the mixture of candy & sugar.Drizzle with the melted chocolate.


 Here is my son Sean & his creations.Not bad for a young baker!
    
*For the wreaths,just use green food coloring instead of the red,shape into circles and continue as above.

Friday, December 9, 2011

Just Had To Share....

How cute are these?If you enjoy making cake pops,you will love these molds!They come in a variety pack,and are a great way to shape your creations!They can be found at http://www.mylittlecupcake.com/ .Check out their site for fun ideas too!